
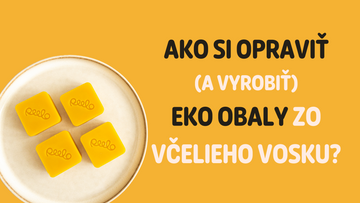
Have you had your Peelo or other eco beeswax wrappers at home for a few months now and they are gradually becoming less sticky than when you first started using them? Are they no longer as conformable to the touch, is their wax layer thinner or do you feel they deserve to be disinfected with heat?
Although beeswax itself is antibacterial, the wax wrapper is not a sterile synthetic wrapper, and a few minutes once in a while while in the heat won't do it any harm. However, if you see that it could use a little extra wax compound, reach for ourPeelo Fixwax brick, which is great just for fixing it. You can use the same process to make your own eco beeswax packaging - read about it at the end of the article. But let's take it one step at a time.
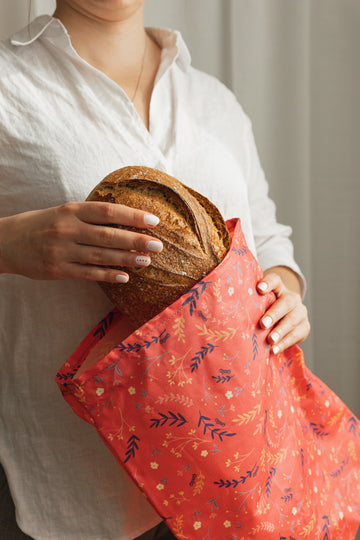
WHAT IS A WAX TOWEL AND HOW TO USE IT?
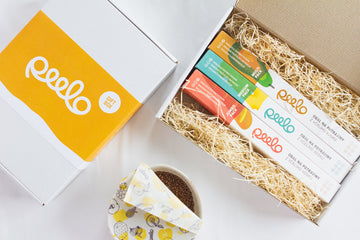
Our wax brick is a unique blend of beeswax, resin, jojoba and coconut oil -exactly the same we use to make our Peelo wax wipes. It will help you restore the wax layer of the wipes and return them to their original properties of -stickiness, adhesion and formability. Thanks to the wax brick, you don't have to hunt down the individual ingredients separately and melt them together first, saving you not only time but also a few sticky pots in the kitchen.

Why doesn't the wax brick contain only beeswax? Jojoba and coconut oils give the napkins flexibility and the resin gives them stickiness. These ingredients are the secret to long-lasting, high-quality wax wipes that won't crumble your beeswax. If you do decide to buy ingredients separately, we recommend that you look for organic quality, as they will be in direct contact with your food.
One brick is enough to repair 5 or more wax wipes (sizes S, M, L) and to make 3 brand new wipes - always depends on the size.
2 WAYS TO FIX NOT ONLY A WAX RING BUT ALSO A WAX SACK
It's been a couple of years since we made our first eco beeswax wrappers, and we've managed to repair a few dozen of them in that time. So we already have a pretty good idea of how to do both wipes renewal options, and we'll advise you on which one is more suitable for you. Before you start repairing, cut or grate your wax brick into small shavings - the smaller they are, the better you'll be able to work with them.
TIP: We like slicing, as the wax comes off the knife much easier than the grater.The resin that is part of the mixture is very sticky and may not be easily washed off with ordinary spring. Simply heat the knife in the oven or over a fire (but beware of the plastic handle!) and wipe off any unruly residue with a paper handkerchief. The good news is that your dishwasher can handle sticky wax just fine.

Time: 15 minutes
1. Ironing napkin
- Cover your work surface with a thick cloth or an older towel.
- Place the following order on the cloth: baking paper, wax napkin, shavings, baking paper.
- The baking paper should always be larger than the napkin itself so you don't ruin the iron with wax.
- Run the iron over the top layer of baking paper and the wax will melt quickly under the heat. Beware, however, that you need to use a classic "dry" iron or turn off the steaming function if you also have a steaming function.
- Carefully separate the napkin from the paper while it is still warm, but be careful not to burn yourself.
- The advantage of this method is that you can squeeze out any excess beeswax that is left on the sides, so that there are no uneven layers of wax on the napkin.


Still not clear on how to do this? Check out video tutorial on how to fix a napkin by ironing on our Instagram.
1.1 Ironing the bag
- When ironing the bag, follow the same procedure as for the napkin, with one small difference - put another baking paper inside the bag.
- Don't forget this seemingly unimportant step, which is actually very important. It avoids inconveniences such as a stuck bag that cannot be opened.


2. Repair in oven
- Heat the oven to 90°C.
- Place a larger piece of parchment paper on a baking sheet, place a wax napkin on top, followed by the wax shavings.
- Leave the knife in the oven for 5 to 10 minutes, watching it carefully and removing it when the wax is completely melted. WARNING however, lest you forget, the combination of cotton fabric and wax is flammable!
- After taking the napkin out of the oven, take the corners and quickly wave it in the air, it will dry in seconds.
- This is our most popular method as it's simple, clean and doesn't need anything special.
- VARIANT B: You can reverse this procedure by melting the entire wax brick in a saucepan and brushing the mixture onto the napkin before putting it in the oven. However, it is a slightly more labour intensive process, which is recommended when making brand new napkins.


Before use, wrinkle and straighten the napkin several times to activate the adhesive layer. In this way, you can repair the wax napkin repeatedly or even several times, extending its life by months or years.
- This method is not suitable for repairing a wax bag, as it could stick permanently.
Photos aren't enough? Check out the detailed video how-to procedure for repairing napkins in the oven that we filmed for you.
OUR TIPS FOR THE END
- You can not only recreate a wax napkin, you can make one. If you have a piece of cotton fabric at home, just cut it out to the size you want and proceed in exactly the same way as for the repair. You will only need a larger amount of wax mixture.
- Add densities incrementally, in this case less is more. If you accidentally add too much of the mixture and you see uneven maps forming on the napkin, feel free to put another piece on it that you plan to recover. The second napkin beautifully soaks up the excess layer of wax.
- You can put the iron in the freezer or fridge for a while, it won't stick to your knife/grater as it will be stiffer.
- You can also choose to heat in the oven when you just want to harden the wax layer, if you feel that you are cracking -then you don't need to add a new layer of wax.
Do you have any questions? Email us and we will be happy to help you with your beeswax eco packaging repair. 🙂

Dobrý deň. Prosím Vás, dajú sa voskové tehličky u Vás kúpiť – objednať? Ak áno, koľko stoja?